When you witness a water pool on your deck, it can be a sight hard to watch. Not only it makes the deck function limited, but it also causes damage to the outer space if you don’t fix the problem at the right time.
If you encounter a similar situation, you might be interested to know how to prevent water puddles on a deck.
A great fix to stop water pooling on the decking is to space the deck boards with a gap of 1/8 inch. Adequate board spacing will allow the water to run off instead of sitting on the surface. Similarly, a standard deck slope of ¼” per foot is necessary to prevent puddles on the deck.
The discomfort of tiptoeing through the puddles on your deck is definitely something you want to avoid. This article explains in detail all the preventive measures you can follow in dealing with it. Read on!
Can You Prevent Water Pooling On A Deck?
One of the most recurrent issues most deck owners might face is water puddles on the deck. Some also call this ponding or bird baths, in which water sits on certain spots on a deck for an extended time.
Standing water can lead to discoloration and warping and initiate the growth of fungus and rot- not to forget the slipping hazard.
Deck drainage issues need to be tackled when installing the decking boards. If not addressed at the right time, you might have limited options, such as removing or reinstalling the deck boards or even modifying the underlying structure.
Now, let’s move on to the ways that can prove helpful in overcoming the formation of water puddles on deck.
1. Allow Spacing Between Deck Boards:
The leading reason water sits on a deck is that the wooden boards are not correctly spaced. As advised by decking professionals, leaving a minimum gap of at least 1/8 inch between the deck boards is crucial.
Adequate spacing makes it easier for the water to run off and stops the moisture from getting trapped under the boards and the joists, which otherwise results in wood rotting and damage.
However, if your deck is already installed with boards closely spaced, you must remove them and reattach them by providing appropriate spacing; it will solve the drainage problem.
2. Create A Slope By Adding Furring Strips:
When the deck slope is insufficient (1/8” or 1% slope), it can also lead to water pooling issue. Thus, to achieve the standard slope of 2% or ¼” per foot, you might have to add furring strips between the deck boards and joists to create a subtle slope.
If you have already laid down the deck, this additional modification would require removing the decking boards.
3. Use Wooden Strips To Give A ¼ Inch Per Foot Slope:
Take two-inch pressure-treated lumber and make strips out of it with the help of a table saw. Make sure the strips are of the same lengths as the joists. As standardly joists have a spacing of 24 inches, you must make each strip around ½ inch thicker than the last one to get the deck slope of ¼ inch per foot.
4. Attach The Strips To The Rim Joist:
Secure the thickest strip in place with nails or screws to the rim joist present at the high end of the deck. Now take the other thickest strip and nail it to the adjacent joist. Perform the same process to the other side of the deck, leaving the opposite rim joist without the supporting strip.
5. Waterproof The Deck Joists:
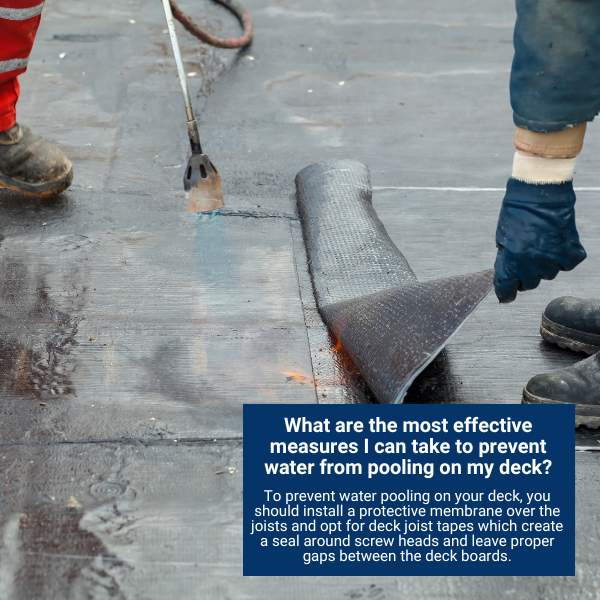
As much as protecting the deck surface from moisture damage is important, this also applies to the underneath structure. One effective way to do this is by installing a protective membrane over the joists. It will prevent the water from dripping from the deck.
There are different types of membranes available such as plastic or vinyl membranes, that you can choose. You can also opt for deck joist tapes which help create a seal around the screw head; as a result, water cannot infiltrate the joists.
Is Deck Boards Gapping Necessary To Avoid Water Pooling?
When installing a deck, we mainly focus on the material that will last in every condition. But, proper deck board spacing is equally essential, especially to overcome the water drainage problem.
In the case of lumber decking, it is common to place the deck boards tightly against each other. The reason is that the boards undergo significant shrinkage over time due to changing seasons. Thus, the resultant gaps between the deck boards are almost accurate for water to drain off quickly.
However, for composite decking, proper board spacing should be done at the very time of deck installation, as reinstalling and re-doing the spacing afterward would cost a lot of time, effort, and money.

When Is It Important To Fix Water Puddles On Decking?
Adequate gapping between the boards is vital for water runoff, and in the absence of it, the chances of rot and molding are increased, plus the slick boards turn hazardous for day-to-day activities.
Ponding or water pooling is such a common phenomenon that professionals give a general ‘rule of thumb’ that tells if the problem needs a fix. In practice, if the water puddle remains active for more than 24 hours, it is considered hazardous and requires repair.
Also Read: Best Wood For Decking: Which One To Choose And Why?
On the other hand, if the water dries within 24 hours, it indicates that it will not sit long enough to cause considerable damage to the deck structure. Therefore, it might not be necessary to do any repairs.
Conclusion:
As much as you may enjoy spending quality time on your deck, water pooling in your favorite outdoor space can be a sight horrifying to watch. Thus, you must take proper precautionary steps during deck installation to avoid this problem.
A few effective measures in this regard include leaving proper gaps between the deck boards and ensuring the deck has ¼” per foot slope for water drainage. But, if you encounter a water pooling problem with an already-built deck, you must remove and re-space the deck boards and create the standard slope.