Deck railings are more than just a safety feature. They provide an aesthetic appeal that can significantly enhance the overall look of your home. However, over time, they can lose their luster due to exposure to the elements.
It’s here that staining comes into play.
Staining your deck railing is an excellent way to restore its beauty and protect it from weather damage. But you might wonder, how exactly do you go about staining a deck railing? What materials would you need to undertake this DIY project effectively?
Clean the deck railing with a suitable cleaner. Lightly sand it for even stain absorption. Apply stain along the grain, let it dry, and reapply if needed. Also, use Wood Sealant for extra protection and longevity. Lastly, ensure proper drying between coats.
Still not sure where to start from? Worry Not, as this comprehensive guide will answer all your questions and walk you through the process step by step. So, Let’s get Started!
Preparing Your Deck Railing For Staining
Before you start staining, it’s crucial to prepare your deck railing properly. It is to ensure that the wood is ready to absorb the protective stain optimally, thereby providing long-lasting results. This involves three main steps: cleaning, sanding, and priming.
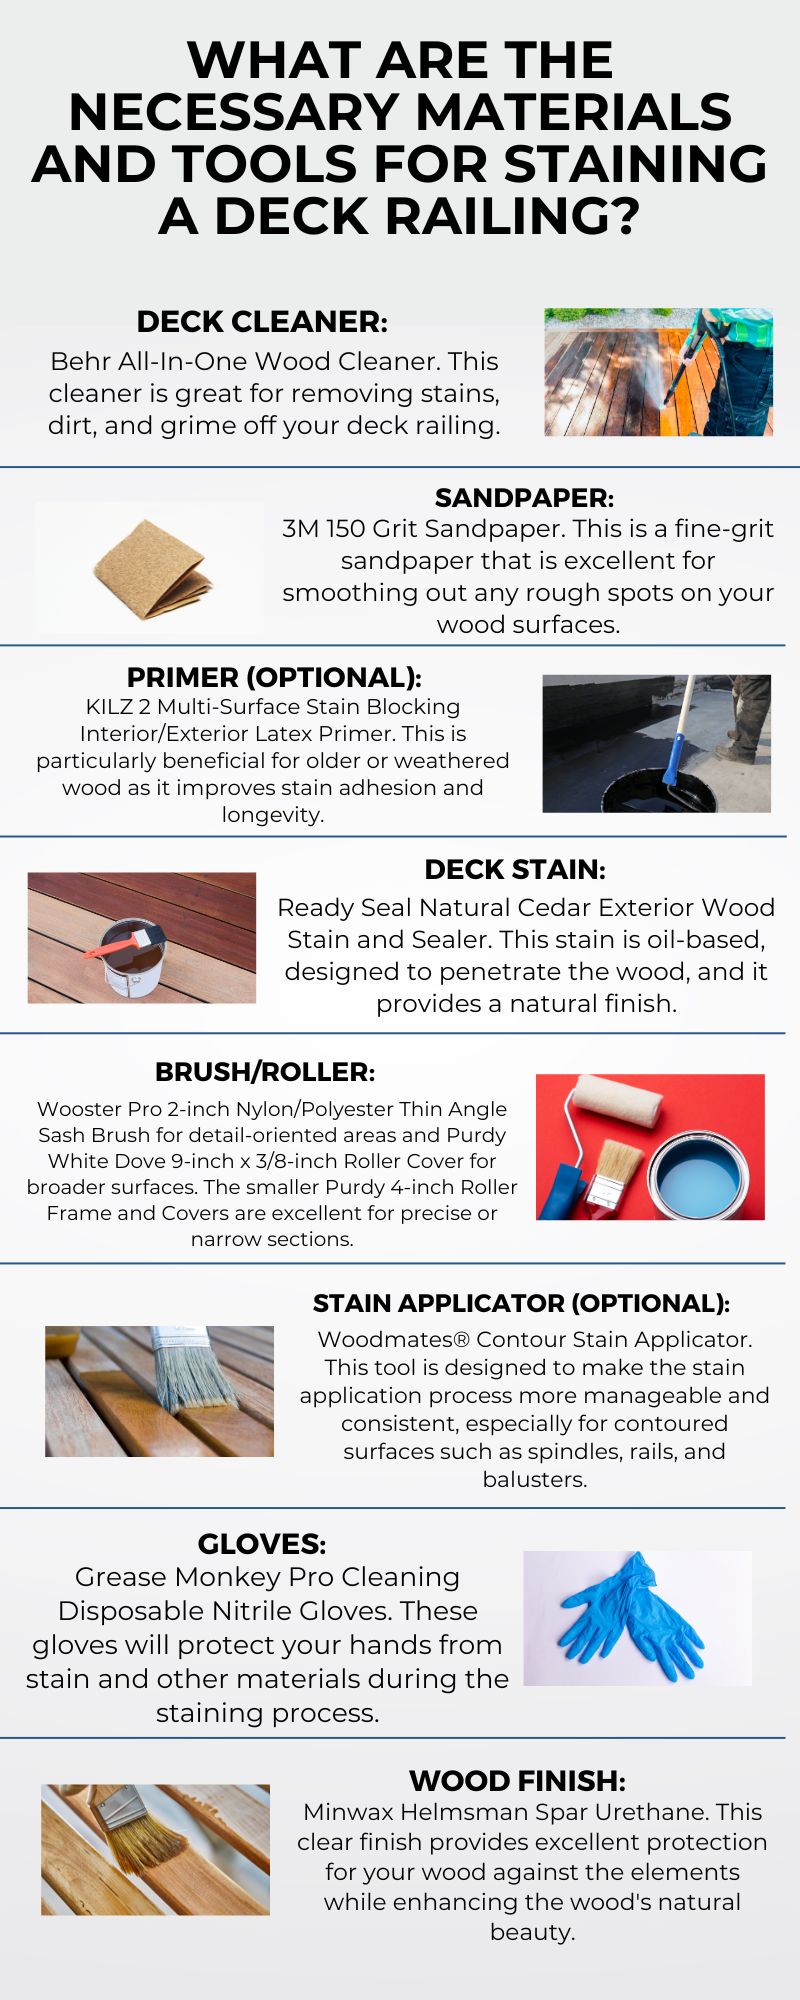
Initial Wash Using Deck Cleaner
A meticulous cleaning is paramount, aimed at stripping away all the dirt, grime, and any loose debris that might have accumulated.
Kick-start the process by using a high-pressure spray nozzle affixed to a regular garden hose. This technique is instrumental in dislodging stubborn dust and grime, helping to eliminate loose particles and prepare the surface for a more intensive cleanup.
If stubborn stains persist, an effective solution of mild detergent and water is recommended. This gentle yet potent mixture aids in breaking down and removing such blemishes, enabling the wood’s natural texture and color to shine through once more.
In the event of a mildew infestation, turning to an oxygenated bleach solution can prove incredibly helpful. Prepare a potent mixture according to the package’s specific instructions, which can then be used to effortlessly eliminate any mildew stains.
Once you’ve scrubbed the deck railings with the cleaning solution, remember to rinse it off thoroughly using clear water. This step ensures that no residue is left behind, which could potentially interfere with the staining process.
Finally, prior to applying the stain, let the railing fully dry. This waiting period is critical as it ensures optimal stain absorption, paving the way for a flawless and durable finish that enhances the longevity and aesthetics of your deck railings.
Sanding The Old Stain To Get Smooth Wood Base
Even though deck railings may not endure the same level of wear and tear as the deck floor, they might still necessitate a gentle touch of sanding to eradicate any troublesome splinters. To assess this, simply run your fingers lightly over each section of the railing.
If you encounter any part, whether an upright or another component of the railing system, that feels rough to the touch, it could benefit from a gentle sanding treatment.
For this procedure, equip your sanding tool with fine-grit sandpaper or a similar attachment. This grit size is more appropriate for eliminating minor roughness without damaging the wood.
Always remember to carry out the sanding in the direction of the wood grain. This ensures a cleaner finish, free from unwanted scratches that can occur if you sand against the grain.
The sanding process serves two significant purposes.
Firstly, it refines the texture of the wood, making it more receptive to the stain.
Secondly, by preparing a smoother surface, the stain can penetrate the wood more evenly, resulting in a more consistent color across the railings.
Once you’ve successfully sanded all the rough spots, it’s essential to clean the wood surface. Use a water hose to gently rinse the sanded surfaces. This will help remove any residual dust or particles from the sanding process.
After rinsing, let the railings air dry thoroughly. It’s crucial that the wood is completely dry before you apply the stain to prevent any inconsistencies in the finish.
Using Primer To Enhance The Stain’s Adherence And Longevity
Although not always necessary, applying a primer can be beneficial if your wood is old or weathered. Over time, wood can lose its ability to hold onto the stain effectively due to natural aging or exposure to harsh weather conditions.
In these instances, a primer can serve as a revitalizing agent, helping to restore the wood’s receptive properties.
Apply the primer in a thin, even coat using a brush or roller. It’s important to be patient and let the primer thoroughly dry as per the manufacturer’s guidelines. The drying time can vary based on the product and environmental conditions, but ensuring complete dryness is a crucial step. Generally, it will take 1 to 3 hours to dry to the touch but should be left for at least 24 hours before applying any stain.
Rushing this process can lead to the stain not adhering as well, resulting in a subpar finish.
Choosing The Right Stain For Deck Railing
Your choice of stain for your deck railing plays a significant role in its durability and appearance. Hence, I’ve compiled a table outlining various stain types, their optimal applications, and extra details to facilitate your decision-making process.
Stain Type | Appearance | Ideal For | Further Details |
Clear | Shows natural wood grain | New and well-preserved wood | Enhances the natural wood color. Ideal for decks that get a lot of sun and haven’t been previously stained or painted. |
Semi-Transparent | Some color, shows some wood grain | Wood in good condition, when you want to add some color | Provides a hint of color while still showing off the wood grain. Ideal for relatively new decks (like 2-3 years old) that are in good shape. Offers more color options (around 75). |
Semi-Solid | More color, some wood texture is visible | Imperfect wood, when you want to hide minor imperfections | Provides even more color, hiding more imperfections but still showing the texture of the wood, including knots. Good for adding warmth while covering up flaws. |
Solid | Rich color, hides wood grain | Older or weathered wood, covers major imperfections | Completely opaque, covers all sorts of imperfections. Ideal for decks with a mix of new and old wood or heavily weathered wood. Still maintains wood texture despite full color coverage. |
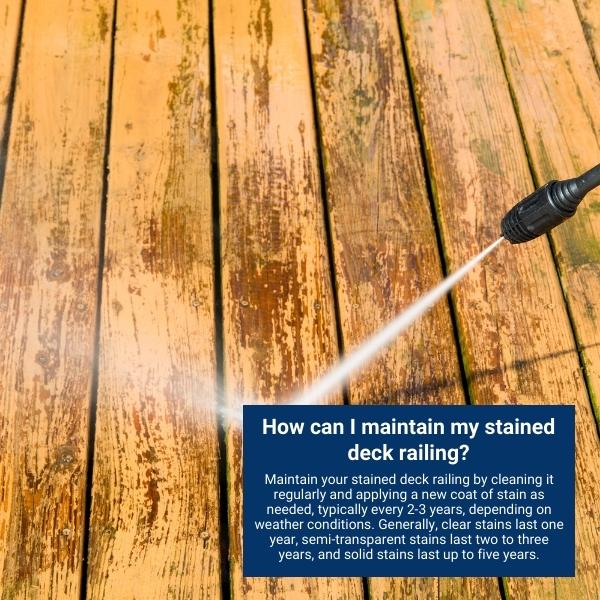
Remember, when testing colors, apply the stain to a sample of the wood you’ll be using, as different woods absorb stain differently. Moreover, the condition of your wood and the stain you choose will determine the longevity of the stain.
For instance, if you’re reapplying a semi-transparent stain, you might need to do it every year to two years, depending on the condition of the wood. Solid stains tend to last a bit longer, so you might need to reapply every three to four years.
Staining Deck Railing: Step-By-Step Guide!
Now that your deck railing is ready and you’ve selected your stain, it’s time to start the work. Below is a step-by-step guide that has proven 100% effective for many expert DIYers.
Applying The Stain:
Start by stirring the stain thoroughly to ensure an even distribution of color pigments. Use a high-quality brush to apply the stain, making sure to follow the direction of the wood grain for optimal absorption.
For an even easier process, consider using a specialized tool like the Stain Applicator. The applicator flexes to conform to contoured surfaces, and its foam pad holds and releases more stain than conventional pads, offering a more consistent application.
Alternatively, you could use a small paint roller for flat-surfaced deck railings. Protect the deck floor with plastic sheeting. Start with the top horizontal board of the deck railing, then coat each upright spindle. Wipe up any drips promptly and follow up with a stain pad to push the stain deeper into the wood’s pores.
In case the deck railings have multiple surfaces, a garden sprayer may be more effective. Line one side of the railing and the floor with plastic sheeting to control the spray, then start from the top and work your way down each spindle.

Removing Excess Stain:
Once the stain is applied, wait for the manufacturer-recommended time (usually 5-15 minutes) to let the stain penetrate the wood. Afterward, wipe off excess stain with a clean, dry rag to prevent stickiness and uneven spots.
The Stain Applicator’s built-in barrier protects your hands from excess stain during this step.
Second Coat Application:
Depending on the desired final color and the wood’s absorbency, a second coat may be necessary. However, ensure the first coat is entirely dry before applying another.
Drying of Stain:
After the staining process is completed, let the stain dry for at least 24 hours before using the deck.
Applying A Wood Finish:
After your deck railing has been prepared and stained, it’s time to apply the wood finish. This step will seal the stain, provide additional protection from the elements, and give the wood a polished look.
Before you begin, protect the surrounding areas from accidental spills or splatters. Lay down cardboard or a drop cloth under the area you will be working on. While most wood finishes are non-toxic once cured, it’s best to avoid getting the finish on your skin during the application process.
Load Your Roller: Using a six-inch roller, which allows for covering larger areas efficiently, load it with the wood finish material. Make sure not to overload your roller; you want to apply a thin, even coat. If you’re working in tighter spaces, a smaller roller or a pad applicator can be used.
Start by applying the wood finish to the deck railing. Work the finish into the cracks and crevices of the wood, taking care to avoid applying too much. This process should be done patiently to ensure a smooth, even finish.
For smaller, intricate areas like spindles, using a brush is more practical. Apply the finish, ensuring that every area is covered. Working systematically will keep the process organized and ensure all parts of the railing receive an even coat.
Make sure to repeat the process of drying and removing any excess material or drips similar to staining.
Cleaning Up:
Easy cleanup is important in any staining process. The Stain Applicator and brush/roller can be cleaned with soap and water for water-based finishes or with mineral spirits followed by soap and water for oil-based finishes. Ensure the tools are completely dry before storing them.
To Wrap Things Up
This comprehensive guide provides you with a practical approach to a DIY staining project that can transform the look of your deck railing while extending its longevity. As a newbie, you might be apprehensive, but rest assured, we’ve covered all bases, making the process accessible and manageable.
In this guide, you’ll learn the essentials of deck railing staining, from preparing the wood, and choosing the right stain to applying it for an even finish. Each step is presented clearly, with tool suggestions and practical techniques.
This isn’t just a guide – it’s your go-to handbook for staining your deck railing. Regardless of whether you are a DIY veteran or a beginner, it’s crafted to help you achieve a successful and satisfying staining project.
Enjoy the process, and take pride in the stunning results!