With your newfound woodworking ability, you can transform any outdoor space with stunning deck projects. To make them even more impressive and protect the wood from fading or warping over time, staining is a must! Adding an extra layer of color to enhance its already natural beauty gives it that special touch of elegance. But what if it has been coated in polyurethane? Can stain still be used on top of this existing coating?
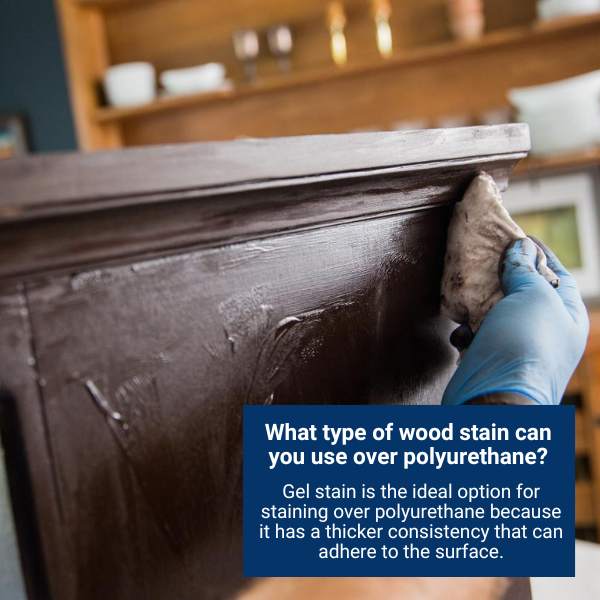
To apply more stain and polyurethane, a gel stain is an ideal option. The protective coat will be layered with the finish that comes from using a gel stain, making your project both stylish and durable. Traditional wood stains are ineffective in this situation due to their lack of ability to penetrate through the existing layer of polyurethane.
Ready to learn the essentials of applying gel stain over polyurethane? This blog will provide a comprehensive guide so you can confidently complete the task. Read on for all the details!
Can You Stain Over Stain And Polyurethane
It is feasible to stain over stain and polyurethane, but it is best if you first grasp what polyurethane is as a product in order to understand how difficult this can be. Polyurethane is one of a class of polymers that, at the molecular level, are connected by tiny strands. This molecular connection gives polyurethane its prized structural stability and longevity.
Since polyurethane coatings are completely sealed, there are no openings for air or water to leak through. So, the purpose of adding polyurethane to a surface is to allow materials like paint or wood stain to simply run off the surface.
What kind of wood stain is able to do this? You would also need a specific kind of wood stain, one that would not just run off when it came into touch with the polyurethane surface. Wood stain with a gel base is the solution! If you want to stain a hardwood surface but are unable to (or do not intend to) strip away the existing polyurethane finish, your only real option is to apply gel stain over it.
As you may guess, with a coating of polyurethane between the wood and the gel stain, the result won’t be precisely the same as if the wood and stain were in direct touch with one another, but using gel stain over polyurethane is simple and will guarantee that your surface is suitably stained. Considering that, this is basically your only choice if you are completing a task that must be finished quickly or if you do not have the tools to remove your polyurethane coating prior to applying your wood stain.
However, if you have chosen that you are planning to go through with applying gel stain on your polyurethane layer, you should take into account that you won’t exactly be staining the wood. You will effectively be applying the gel stain’s color to your already-existing polyurethane coating because polyurethane includes many of the same components as gel stain.
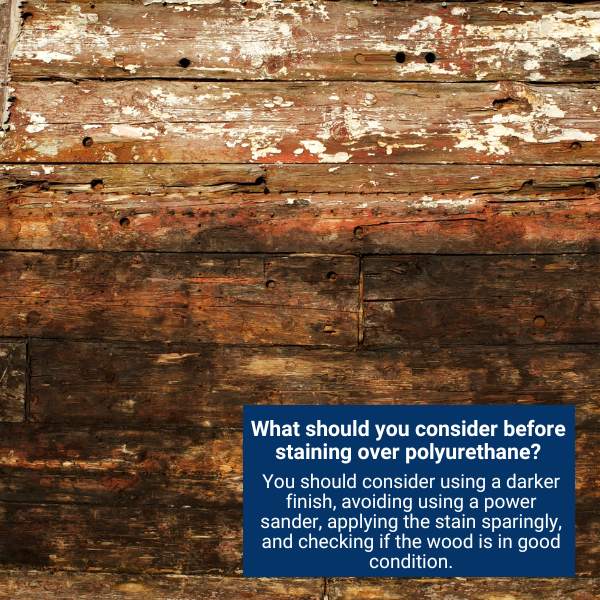
Things To Consider Before Staining Over Polyurethane
When staining polyurethane surfaces, there are a few things to consider. In order to create your chosen appearance, you will ultimately be attempting to get around the fact that polyurethane is intended to safeguard your hardwood surfaces from deterioration and corrosion. When staining polyurethane finishes, there are a few things to keep in mind that should help you always get the greatest finish.
● If Possible, Use A Darker Finish:
No matter what type of finish you are staining over—polyurethane, varnish, etc.—you must always try to go for a darker shade. Why? Although current finishes often have a distinct hue, you would prefer your choice to be the one that stands out the most. Although polyurethane often lacks color, the wood beneath does, thus the objective here is to make the existing color stand out using your gel stain.
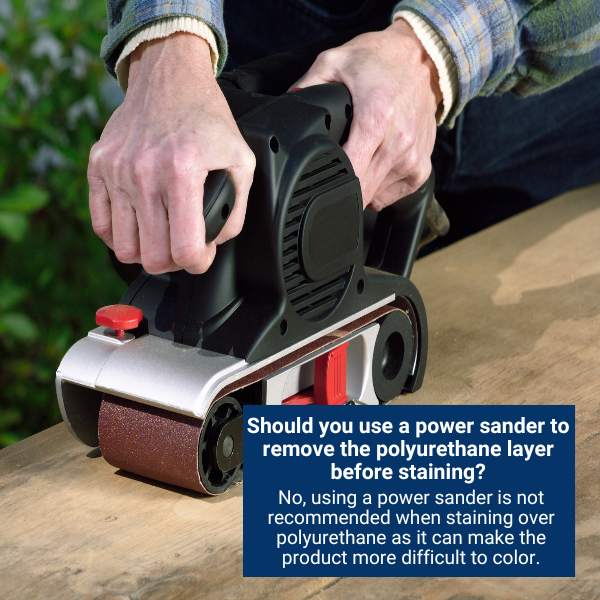
● Refrain From Using A Power Sander:
Despite the fact that employing a power sander in this situation can appear detrimental to the project at hand, it won’t be in your best financial interest. While you might believe that using a power sander to totally remove a surface layer is a smart option, you are not supposed to do this when staining over polyurethane.
Why? Because polyurethane permeates into the wood’s grain, eliminating all of the coats could certainly make your product more difficult to color. This procedure aims to reveal a portion of the polyurethane that has not yet been treated by the environment’s exposure by removing the uppermost layer. Instead of doing this, I suggest using some sandpaper or even a sanding board.
● Apply Your Stain Sparingly:
If you have ever used stain, you are aware that adding quite as much stain as your woodwork can bear won’t help enhance the finish’s quality. In fact, doing so can completely alter the gloss you were going for by saturating the wood fibers. When staining over polyurethane, the same idea holds true.
● Check To See If Your Wood Is In Good Condition:
No matter how diligently you keep your wooden workpieces, they will ultimately deteriorate, fracture, and fall apart, even though we don’t mention it out loud. Depressing? Undoubtedly, but it is a fact that we must all face, particularly if you plan to resurface a wooden workpiece. Why is this crucial? It will be ineffective when you are sanding or staining over an old stain if your wood is practically breaking apart.
How To Stain Over Stain And Polyurethane In 7 Easy Steps
It’s time to describe the steps I would take to apply stain to a polyurethane surface. You can easily use a gel stain to stain over polyurethane by following these 7 simple steps. These actions guarantee the highest level of quality.
● Cleaning With Degreaser:
Cleansing is essential, more essential than most people realize. A polyurethane surface must be clear of grease and filth in order to properly apply and maintain a gel stain on it. You can use a similar procedure to prepare furnishings for sanding and staining. You can either use Krud Kutter or hot water and dishwashing soap.
You can use the degreaser Krud Cutter to cover the entire surface, and then wipe it all down with a fresh rag. It is advisable to remove any remaining cleaning agent with hot water and cloth once the area has been cleaned. The best course of action is to eliminate all traces of the cleaning solution because you want nothing to remain behind your stain. Then you can attempt to dry the item as best you can using a thoroughly dry, lint-free rag or cloth. Before beginning, you must let the item entirely air dry out at this point.
● Mild Sanding To Scuff:
The gel stain will adhere much better if you lightly scuff sand using 220-grit sandpaper or a sanding pad, as I briefly stated earlier. Scuff sanding is really helpful because nothing sticks well to polyurethane because it is typically quite shiny.
● Remove Dust:
There will be a little sanding dust since you only lightly sanded the surface. If you don’t clean this up before applying your gel stain, the stain will appear unclean. The use of a tack cloth is the most effective cleaning technique at this stage of the procedure. After scuff sanding, you need to have a tack cloth, which is similar to an adhesive rag that collects surface dust.
You can wipe the possible stain-prone areas, and after that, it ought to be dust-free and stain-free. You occasionally use a wet rag since it will effectively remove surface dust, making it function somewhat comparable to a tacking cloth.
● Use Gel Stain:
How you apply gel stain, whether with a foamy brush or a clean, lint-free fabric, is less important than cleaning it off. Just be sure to use a hygienic applicator when applying because old or visible paint or dust might cause textural difficulties that you wish to avoid.
Here Is How You Can Apply Gel Stain In 3 Steps:
- Scoop a substantial chunk of gel stain from the container onto a clean, lint-free rag.
- Take the gel cloth and apply it to the surface you’re staining. Rub it around in a clockwise direction or back and forth until the entire surface is coated in gel stain.
- Now, wait a few minutes before attempting to remove the stain.
As you can see, the procedure is rather easy and, in my opinion, subjective. Gel stain can essentially be applied however you feel most comfortable. Maintaining cleanliness is all that is necessary to avoid problems, and sparingly applying will only result in product waste. Gel stains are only effective in small amounts and take a very long time to thoroughly dry.
● Clean Up Gel Stain:
The wiping procedure is the most crucial step in spreading gel stain, particularly when doing so over a completed surface. Because the method you wipe out the stain will determine how it looks when completed, this step is crucial. You should clean with the grain as you are staining a final polyurethane surface. This is a fantastic idea in and of itself, however, applying stain to finished wood is different than applying it to bare wood since the stain follows the grain when applied to natural wood. If you want the lines you wipe to look as authentic as possible, you should complement them to the texture.
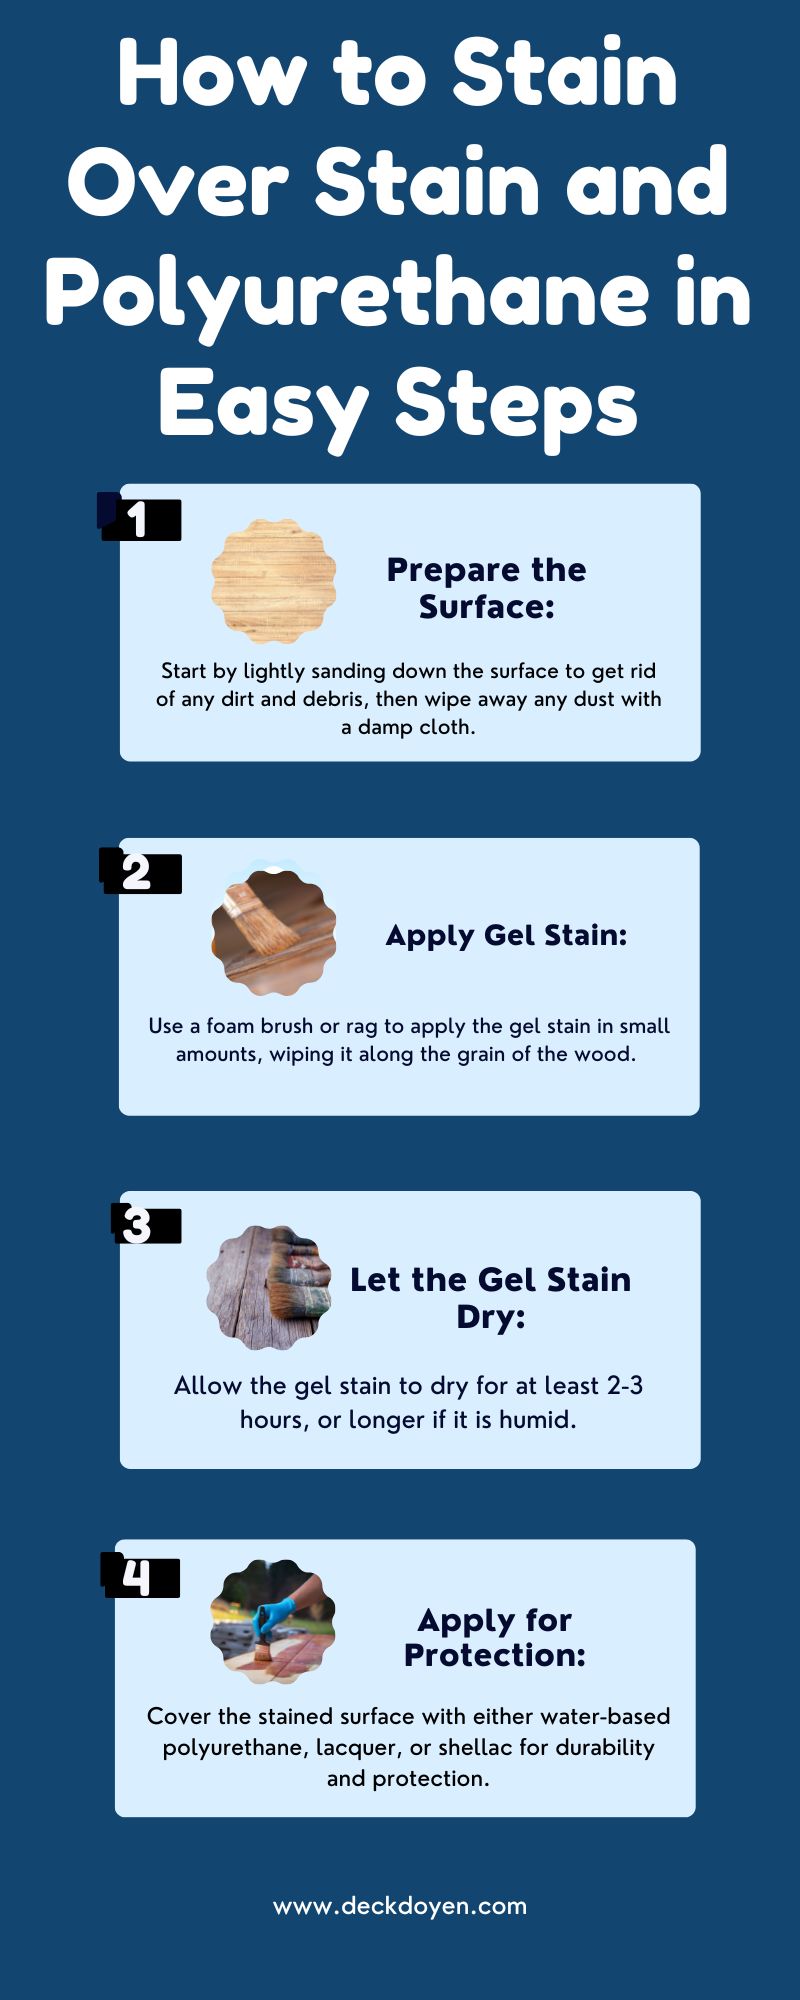
● Let The Gel Stain Dry:
Alright, perhaps you did occasionally lose your temper, but trust me, that is how this activity works. To gradually improve, you must make errors and learn from them.
Nevertheless, you have now finished applying the gel dye to achieve the desired effect. If you are experiencing problems, follow these instructions:
- To restart, if you used an oil-based gel stain, remove it with natural solvents and a rag.
- To restart if you have applied a water-based gel stain, wipe it away with water and a cloth.
In this staining procedure, faults are easy to make and simple to repair.
When you’ve finally achieved the smile-inducing expression, let it rest for a minimum of 2-3 hours. If the weather is humid, you will occasionally let the gel stain lie overnight to harden to the touch. This should take a couple of days for things to dry and firm up to a durable surface if you put a coat over the still-wet surface.
● Add Protective Layer:
By protection, I mean covering the surface with a clear topcoat to keep the gel stain we just applied from fading. Gel stain needs to be added in order to become durable enough for frequent usage since it is not. There are several alternatives available:
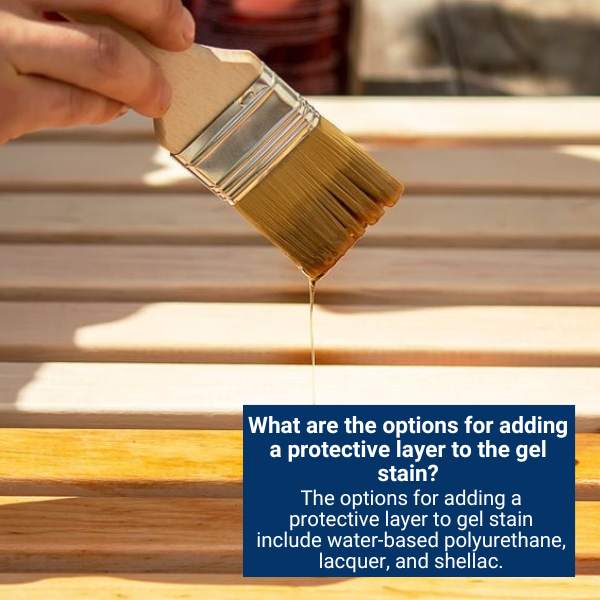
- Applying Water-based Polyurethane: While there are other ways to apply Water-based Polyurethane, using a foaming applicator or foam brush is the simplest and most user-friendly method. That might leave a few specks, but it is a simple choice. Simply put your foaming applicator into the polyurethane and start wiping straight lines across the grain; however, avoid wiping while the gel stain is still wet to avoid a messy situation. Just wipe or brush the whole stained surface until it is completely covered.
- Lacquer and Shellac: I prefer lacquer, but you should only utilize it if you have the right equipment and ventilation because the fumes are unpleasant, and you do not want to breathe them in. I would only use a can to spray it, however, a spray gun might be used if you have the necessary tools. Lacquer will offer a fairly durable surface, but for effective protection, you should add at least 4 coats. Shellac can be applied similarly to lacquer; for longevity, apply four or more coats using a spray bottle, which is typically more expensive.
Conclusion
Enhancing the natural color and texture of wood with stain is a terrific idea. You might not be content with your present polyurethane stain, though. The good news is that polyurethane can be stained with a gel stain. Many people avoid staining because there is not enough reliable information on the subject. You may put gel stain over stained wood without attempting to sand down the entire job, but there are several things to keep in mind.
This blog will guide you through the steps of applying a gel stain over polyurethane and will cover all the necessary information. I also hope that this guide has shed some light on the staining and glazing industry. While it is definitely possible to stain over poly, make sure to add a second upper surface of poly to shield the stain from scuffs and other types of damage.